


ASA#1_IP_Telnet_SSH - Phần 1
Sơ đồ:

0: Ext: Management0/0 : address is 000c.29e5.3037, irq 10, VMNet1
1: Ext: GigabitEthernet0/0 : address is 000c.29e5.3041, irq 5, VMNet8
2: Ext: GigabitEthernet0/1 : address is 000c.29e5.304b, irq 9
3: Ext: GigabitEthernet0/2 : address is 000c.29e5.3055, irq 10
Dowload Cisco ASA Version 9.2 on VMware => https://goo.gl/RhnMya
Download Private Shell: https://goo.gl/bb1ueK
Note:
ciscoasa> enable
Password:
Mô tả:
Bài lab này sẽ hướng dẫn thực tập một số kỹ năng làm quen với thiết bị firewall asa của cisco. Đầu tiên là chúng ta sẽ tìm hiểu về version của ios. Cấu hình cơ bản như: Đặt hostname, cấu hình password, cấu hình ip cho interface trên thiết bị, security-level (cấp độ bảo mật).Cấu hình telnet, ssh cho asa từ xa. Ngoài ra sẽ tiến hành backup ios cho asa, load lại ios khi bị mất, recovery password cho thiết bị firewall asa.
Cấu hình:
Phần 1: Kiểm tra License
- Kiểm tra version của thiết bị firewall asa: show version
FW-ASA-DTU# show version
Cisco Adaptive Security Appliance Software Version 9.2(1)
Device Manager Version 7.2(1)
Compiled on Thu 24-Apr-14 12:14 PDT by builders
System image file is "boot:/asa921-smp-k8.bin"
Config file at boot was "startup-config"
FW-ASA-DTU up 45 mins 16 secs
Hardware: ASAv, 2048 MB RAM, CPU Xeon 5500 series 2394 MHz,
Internal ATA Compact Flash, 256MB
Slot 1: ATA Compact Flash, 8192MB
BIOS Flash Firmware Hub @ 0x0, 0KB
0: Ext: Management0/0 : address is 000c.29e5.3037, irq 10
1: Ext: GigabitEthernet0/0 : address is 000c.29e5.3041, irq 5
2: Ext: GigabitEthernet0/1 : address is 000c.29e5.304b, irq 9
3: Ext: GigabitEthernet0/2 : address is 000c.29e5.3055, irq 10
ASAv Platform License State: Unlicensed
*Install -587849120 vCPU ASAv platform license for full functionality.
The Running Activation Key is not valid, using default settings:
Licensed features for this platform:
Virtual CPUs : 0 perpetual
Maximum Physical Interfaces : 10 perpetual
Maximum VLANs : 50 perpetual
Inside Hosts : Unlimited perpetual
Failover : Active/Standby perpetual
Encryption-DES : Enabled perpetual
Encryption-3DES-AES : Enabled perpetual
Security Contexts : 0 perpetual
GTP/GPRS : Disabled perpetual
AnyConnect Premium Peers : 2 perpetual
AnyConnect Essentials : Disabled perpetual
Other VPN Peers : 250 perpetual
Total VPN Peers : 250 perpetual
Shared License : Disabled perpetual
AnyConnect for Mobile : Disabled perpetual
AnyConnect for Cisco VPN Phone : Disabled perpetual
Advanced Endpoint Assessment : Disabled perpetual
UC Phone Proxy Sessions : 2 perpetual
Total UC Proxy Sessions : 2 perpetual
Botnet Traffic Filter : Enabled perpetual
Intercompany Media Engine : Disabled perpetual
Cluster : Disabled perpetual
This platform has an ASAv VPN Premium license.
Serial Number: 9ABBHQ1E2G6
Running Permanent Activation Key: 0x00000000 0x00000000 0x00000000 0x00000000 0x00000000
Image type : Release
Key version : A
Configuration last modified by enable_15 at 07:14:41.239 UTC Mon Nov 13 2017
FW-ASA-DTU#
Qua command show version, chúng ta đã thấy được các thông tin về thiết bị asa, bao gồm : ios của asa, hardware asa, các interface vật lí của asa, các đặc điểm đã được active bởi license key, ngày giờ chỉnh sửa cuối cùng của file cấu hình.
Phần 2: Cấu hình cơ bản
-
Đặt hostname cho asa là FW-ASA-DTU.
-
Cấu hình password cho asa.
-
Cấu hình enable interface, cấu hình IP cho interface, name cho interface.
-
Cấu hình security-level trên interface.
2.1) Đặt hostname cho asa là FW-ASA-DTU
Trên Cisco ASA, câu lệnh “hostname” được sử dụng để đặt tên cho asa. Tên của asa sẽ giúp cho công việc quản lý asa được dễ dàng hơn và hiệu quả hơn.
FW-ASA-DTU#configure terminal
FW-ASA-DTU(config)#hostname FW-ASA-DTU
FW-ASA-DTU(config)#
2.2. Cấu hình password cho asa
Để cấu hình password cho asa, chúng ta dùng command:
FW-ASA-DTU#configure terminal
FW-ASA-DTU(config)#enable password dtu
2.3. Cấu hình enable interface, cấu hình IP cho interface, name cho interface
Tiếp theo, ta sẽ enable interface, ta thực hiện như sau:
FW-ASA-DTU#configure terminal
FW-ASA-DTU(config)#interface Management0/0
FW-ASA-DTU(config-if)#no shutdown
FW-ASA-DTU(config-if)#
Đối với các dòng ASA 5505 và ASA 5510 thì sẽ có 4 cổng fastEthernet (Ethernet0/0 – Ethernet0/3) và một interface quản lí (management interface): Management0/0.
Trong khi đó đối với các dòng ASA 5520 và ASA 5540 sẽ có 4 cổng Gigabit Ethernet (GigabitEthernet0/0–GigabitEthernet0/3) và một interface quản lí (management interface (Management0/0)). Mặc định các interface sẽ ở trạng thái shutdown, để enable các interface chúng ta sẽ sử dụng lên no shutdown.
Để đặt IP, ta vào trong cổng E0/0 và cấu hình địa chỉ ip là 192.168.20.100/24, ta làm như sau:
FW-ASA-DTU# configure terminal
FW-ASA-DTU(config)# interface Management0/0
FW-ASA-DTU(config-if)# ip address 192.168.20.100 255.255.255.0
Địa chỉ IP trên cổng giúp router giao tiếp mạng với các thiết bị khác bằng giao thức truyền tải IP. Nếu IP trên cổng được cấp bởi 1 dhcp server thì ta có thể làm như sau:
FW-ASA-DTU# configure terminal
FW-ASA-DTU(config)# interface GigabitEthernet0/0
FW-ASA-DTU(config-if)# ip address dhcp setroute
Câu lệnh “ip address dhcp setroute” sẽ giúp chúng ta nhận được ip từ dhcp server. Để cấu hình tên cho cổng, chúng ta sẽ dùng lệnh:
FW-ASA-DTU# configure terminal
FW-ASA-DTU(config)# interface Management0/0
FW-ASA-DTU(config-if)# nameif inside
Câu lệnh “nameif” dùng để đặt tên cho interface, tên của interface sẽ dùng để cấu hình các đặc tính sau này như NAT, PAT, access-list, ...
2.4. Cấu hình security-level trên interface
Tiếp theo chúng ta sẽ cấu hình cấp độ bảo mật (security-level) cho các interface, ta thực hiện như sau:
FW-ASA-DTU# configure terminal
FW-ASA-DTU(config)# interface Management0/0
FW-ASA-DTU(config-if)# security-level 100
ASA cho phép chúng ta định nghĩa cấp độ bảo mật trên mỗi interface. Cấp độ bảo mật càng cao, thì độ tin cậy càng lớn và ngược lại. Cấp độ bảo mật có giá trị từ 0 – 100. Mặc định thì vùng outside (vùng nối với nơi ít tin cậy như internet, …) sẽ có security-level là 0 và ngược lại những vùng inside (mạng nội bộ) sẽ có cấp độ bảo mật cao nhất là 100.
Kiểm tra: Ta kiểm tra địa chỉ IP trên cổng bằng cách sử dụng lệnh “show interface ip brief”.
FW-ASA-DTU# show interface ip brief
Interface IP-Address OK? Method Status Protocol
GigabitEthernet0/0 unassigned YES unset administratively down up
GigabitEthernet0/1 unassigned YES unset administratively down up
GigabitEthernet0/2 unassigned YES unset administratively down up
Management0/0 192.168.20.100 YES manual up up
FW-ASA-DTU#
Để kiểm tra 1 interface cụ thể, ta sử dụng lệnh “show interface Management0/0”
FW-ASA-DTU# show interface management 0/0
Interface Management0/0 "inside", is up, line protocol is up
Hardware is i82545EM rev01, BW 1000 Mbps, DLY 10 usec
Auto-Duplex(Full-duplex), Auto-Speed(1000 Mbps)
Input flow control is unsupported, output flow control is off
MAC address 000c.29e5.3037, MTU 1500
IP address 192.168.20.100, subnet mask 255.255.255.0
1141 packets input, 84343 bytes, 0 no buffer
Received 0 broadcasts, 0 runts, 0 giants
0 input errors, 0 CRC, 0 frame, 0 overrun, 0 ignored, 0 abort
0 pause input, 0 resume input
0 L2 decode drops
938 packets output, 70663 bytes, 0 underruns
0 pause output, 0 resume output
0 output errors, 0 collisions, 1 interface resets
0 late collisions, 0 deferred
363 input reset drops, 0 output reset drops
input queue (blocks free curr/low): hardware (483/461)
output queue (blocks free curr/low): hardware (511/502)
Traffic Statistics for "inside":
778 packets input, 32260 bytes
938 packets output, 53616 bytes
9 packets dropped
1 minute input rate 4 pkts/sec, 164 bytes/sec
1 minute output rate 5 pkts/sec, 280 bytes/sec
1 minute drop rate, 0 pkts/sec
5 minute input rate 0 pkts/sec, 14 bytes/sec
5 minute output rate 0 pkts/sec, 24 bytes/sec
5 minute drop rate, 0 pkts/sec
Management-only interface. Blocked 0 through-the-device packets
FW-ASA-DTU#
Kiểm tra: Chúng ta sẽ tiến hành kiểm tra kết nối giữa firewall asa và máy tính bằng lệnh “ping”.

Phần 3: Telnet
-
Yêu cầu 1: Các máy telnet tới asa phải nằm trong miền inside hoặc dmz, nếu các máy ở vùng outside muốn telnet vào asa thì phải có hỗ trợ ipsec tunnel.
-
Yêu cầu 2: Đặt password telnet cho asa.
-
Yêu cầu 3: Các máy telnet vào asa phải có hỗ trợ giao thức telnet hoặc sử dụng chương trình hỗ trợ telnet để thực hiện telnet vào asa.
Bước 1: Kiểm tra thông tin Interface
Trước tiên chúng ta đi kiểm tra thông tin của Interface Management.
VMware => Menu VM => Settings … => Xem tất cả MAC của các Network Adapter.

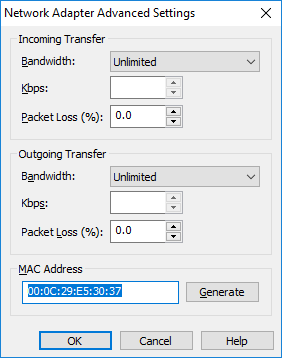
Quan sát MAC Address của các Card mạng để xác định loại Interface cho chính xác.
FW-ASA-DTU# show version
Cisco Adaptive Security Appliance Software Version 9.2(1)
Device Manager Version 7.2(1)
0: Ext: Management0/0 : address is 000c.29e5.3037, irq 10
1: Ext: GigabitEthernet0/0 : address is 000c.29e5.3041, irq 5
2: Ext: GigabitEthernet0/1 : address is 000c.29e5.304b, irq 9
3: Ext: GigabitEthernet0/2 : address is 000c.29e5.3055, irq 10
Sau khi xác định MAC 000c.29e5.3037 tương ứng với “Card Network Adapter” trên máy ảo VMWare thì chúng ta cần xác định chính xác loại VMNet nào để kết nối với máy thật Windows. Ở đây chúng ta dùng VMNet8 cho Interface Management.
Bước 2: Cấu hình cho Interface Management0/0
!
interface Management0/0
management-only
nameif inside
security-level 100
ip address 192.168.20.100 255.255.255.0
!
Bước 3: Cấu hình mật khẩu Telnet & cho phép Subnet được Telnet
Cấu hình password để tăng cường bảo mật cho 1 phiên (session) telnet. Tuy nhiên, khác với ssh, password của telnet sẽ không được mã hóa(encrypted) khi đi trên đường truyền.
FW-ASA-DTU# configure terminal
FW-ASA-DTU(config)# passwd cisco123 //password cho telnet
FW-ASA-DTU# configure terminal
FW-ASA-DTU(config)# telnet 192.168.20.0 255.255.255.0 inside
Telnet là một chương trình cho phép ta kế nối và đăng nhập vào một máy tinh từ xa(trong LAN, internet). Khi kết nối thành công, máy tinh của ta sẽ thực hiện chức năng như trạm trung gian để gửi yêu cầu đến các máy tính đầu xa. Ta có thể truy cậpthông tin, thực thi chương trình và sử dụng một số tài nguyên khác ở máy tinh từ xa.
Cấu trúc của lệnh telnet:
telnet {{IP_address mask} | ipv6_address/prefix} interface}
Với IP_address mask sẽ là địa chỉ ip và subnet mask của máy (hoặc các máy) thuộc cùng một interface sẽ được phép telnet tới asa. Timeout là số phút tối đa cho 1 phiên telnet ở trạng thái idle ( timeout có giá trị từ 1 – 1440 phút).
Bước 4: Dùng Private Shell để Telnet vào Firewall ASA
Đứng tại máy thật Windows ping vào ASA.

Chúng ta thấy 2 thiết bị đã thông mạng.
Mở Private Shell để Telnet vào ASA.

Telnet password: dtu123
Password of Privilege mode: dtu
Telnet thành công!

FW-ASA-DTU# show run
: Saved
:
: Serial Number: 9ABBHQ1E2G6
: Hardware: ASAv, 2048 MB RAM, CPU Xeon 5500 series 2394 MHz
:
ASA Version 9.2(1)
!
hostname FW-ASA-DTU
enable password hAPB9Mw30flcY4kz encrypted
xlate per-session deny tcp any4 any4
xlate per-session deny tcp any4 any6
xlate per-session deny tcp any6 any4
xlate per-session deny tcp any6 any6
xlate per-session deny udp any4 any4 eq domain
xlate per-session deny udp any4 any6 eq domain
xlate per-session deny udp any6 any4 eq domain
xlate per-session deny udp any6 any6 eq domain
passwd r/GApwtPETElZ6aH encrypted
names
!
interface GigabitEthernet0/0
shutdown
no nameif
no security-level
no ip address
!
interface GigabitEthernet0/1
shutdown
no nameif
no security-level
no ip address
!
interface GigabitEthernet0/2
shutdown
no nameif
no security-level
no ip address
!
interface Management0/0
management-only
nameif inside
security-level 100
ip address 192.168.20.100 255.255.255.0
!
ftp mode passive
pager lines 23
mtu inside 1500
no failover
icmp unreachable rate-limit 1 burst-size 1
no asdm history enable
arp timeout 14400
no arp permit-nonconnected
timeout xlate 3:00:00
timeout pat-xlate 0:00:30
timeout conn 1:00:00 half-closed 0:10:00 udp 0:02:00 icmp 0:00:02
timeout sunrpc 0:10:00 h323 0:05:00 h225 1:00:00 mgcp 0:05:00 mgcp-pat 0:05:00
timeout sip 0:30:00 sip_media 0:02:00 sip-invite 0:03:00 sip-disconnect 0:02:00
timeout sip-provisional-media 0:02:00 uauth 0:05:00 absolute
timeout tcp-proxy-reassembly 0:01:00
timeout floating-conn 0:00:00
dynamic-access-policy-record DfltAccessPolicy
user-identity default-domain LOCAL
no snmp-server location
no snmp-server contact
crypto ipsec security-association pmtu-aging infinite
crypto ca trustpool policy
telnet 192.168.20.0 255.255.255.0 inside
telnet timeout 5
ssh stricthostkeycheck
ssh timeout 5
ssh key-exchange group dh-group1-sha1
console timeout 0
threat-detection basic-threat
threat-detection statistics access-list
no threat-detection statistics tcp-intercept
!
class-map inspection_default
match default-inspection-traffic
!
!
policy-map type inspect dns preset_dns_map
parameters
message-length maximum client auto
message-length maximum 512
policy-map global_policy
class inspection_default
inspect dns preset_dns_map
inspect ftp
inspect h323 h225
inspect h323 ras
inspect rsh
inspect rtsp
inspect esmtp
inspect sqlnet
inspect skinny
inspect sunrpc
inspect xdmcp
inspect sip
inspect netbios
inspect tftp
inspect ip-options
!
service-policy global_policy global
prompt hostname context
call-home reporting anonymous prompt 2
call-home
profile CiscoTAC-1
no active
destination address http https://tools.cisco.com/its/service/oddce/services/DDCEService
destination address email callhome@cisco.com
destination transport-method http
subscribe-to-alert-group diagnostic
subscribe-to-alert-group environment
subscribe-to-alert-group inventory periodic monthly 1
subscribe-to-alert-group configuration periodic monthly 1
subscribe-to-alert-group telemetry periodic daily
Cryptochecksum:6fef5511cb558ed3c2b4dbf44b1d8af6
: end
FW-ASA-DTU#
Kiểm tra:
Để kiểm tra các máy tinh nào đang thực hiện telnet vào máy tính, chúng ta dùng lệnh “who”.
FW-ASA-DTU# who
0: 192.168.20.1
FW-ASA-DTU#
Output là các máy hiện đang kết nối, “0” là session id và 192.168.1.2 là ip của thiết bị đang kết nối tới asa.
Để ngắt kết nối 1 phiên telnet ngày lập tức, chúng ta có thể dùng command “kill”.
FW-ASA-DTU# kill 0
Lệnh “kill ” sẽ disconnect 1 session telnet tới asa ngay lập tức.
- Tìm hiểu quy ước đặt tên thiết bị lưu trữ trong Linux
- Tìm hiểu cấu trúc i-node và cách đọc thông tin tệp tin trong Linux
- Xu hướng mới trong phân tích và thiết kế hệ thống thông tin
- MuZero – Thuật toán Trí tuệ nhân tạo có khả năng tự học mạnh mẽ
- Chủ đề OSCP (Port Redirection and SSH Tunneling) (tiếp theo)